Netcloud24 prepares your server environment from A to Z. We configure Windows Server, RDS, user accounts, VPN access and backups for the agreed service. You do not need to configure the server yourself. The steps below only show how to use your ready-made access on your own computer. See how your team works through RDS from Windows and Mac.
Connecting to your Windows VPS starts in the Netcloud24 client area: download your personal VPN profile, activate it in WireGuard, then open Remote Desktop with the connection details assigned to your service. This guide follows that process from the client panel to the Windows sign-in and certificate prompts.
The examples show a Windows computer and an existing VPN service. Use the addresses and credentials in your own client panel; the values visible in the images belong to a demonstration and are not connection details for other customers.
Watch the video walkthrough
Follow this English-language video to see how Windows VPS access works, set up your WireGuard connection and sign in with Remote Desktop. Then use the illustrated steps below to follow along at your own pace.
Before you begin
Have your Netcloud24 account login, permission to install applications on your computer, and the VPS credentials supplied with your service ready. You need two separate items: the WireGuard application and your device-specific VPN configuration. Installing the application alone does not grant access to your VPS.
Your VPN profile is available from the client panel. Treat the downloaded configuration as confidential because it can contain private authentication material. Use a separate device profile for each computer and contact support if a device is lost or its profile is exposed.
1. Download your VPN profile from the client area
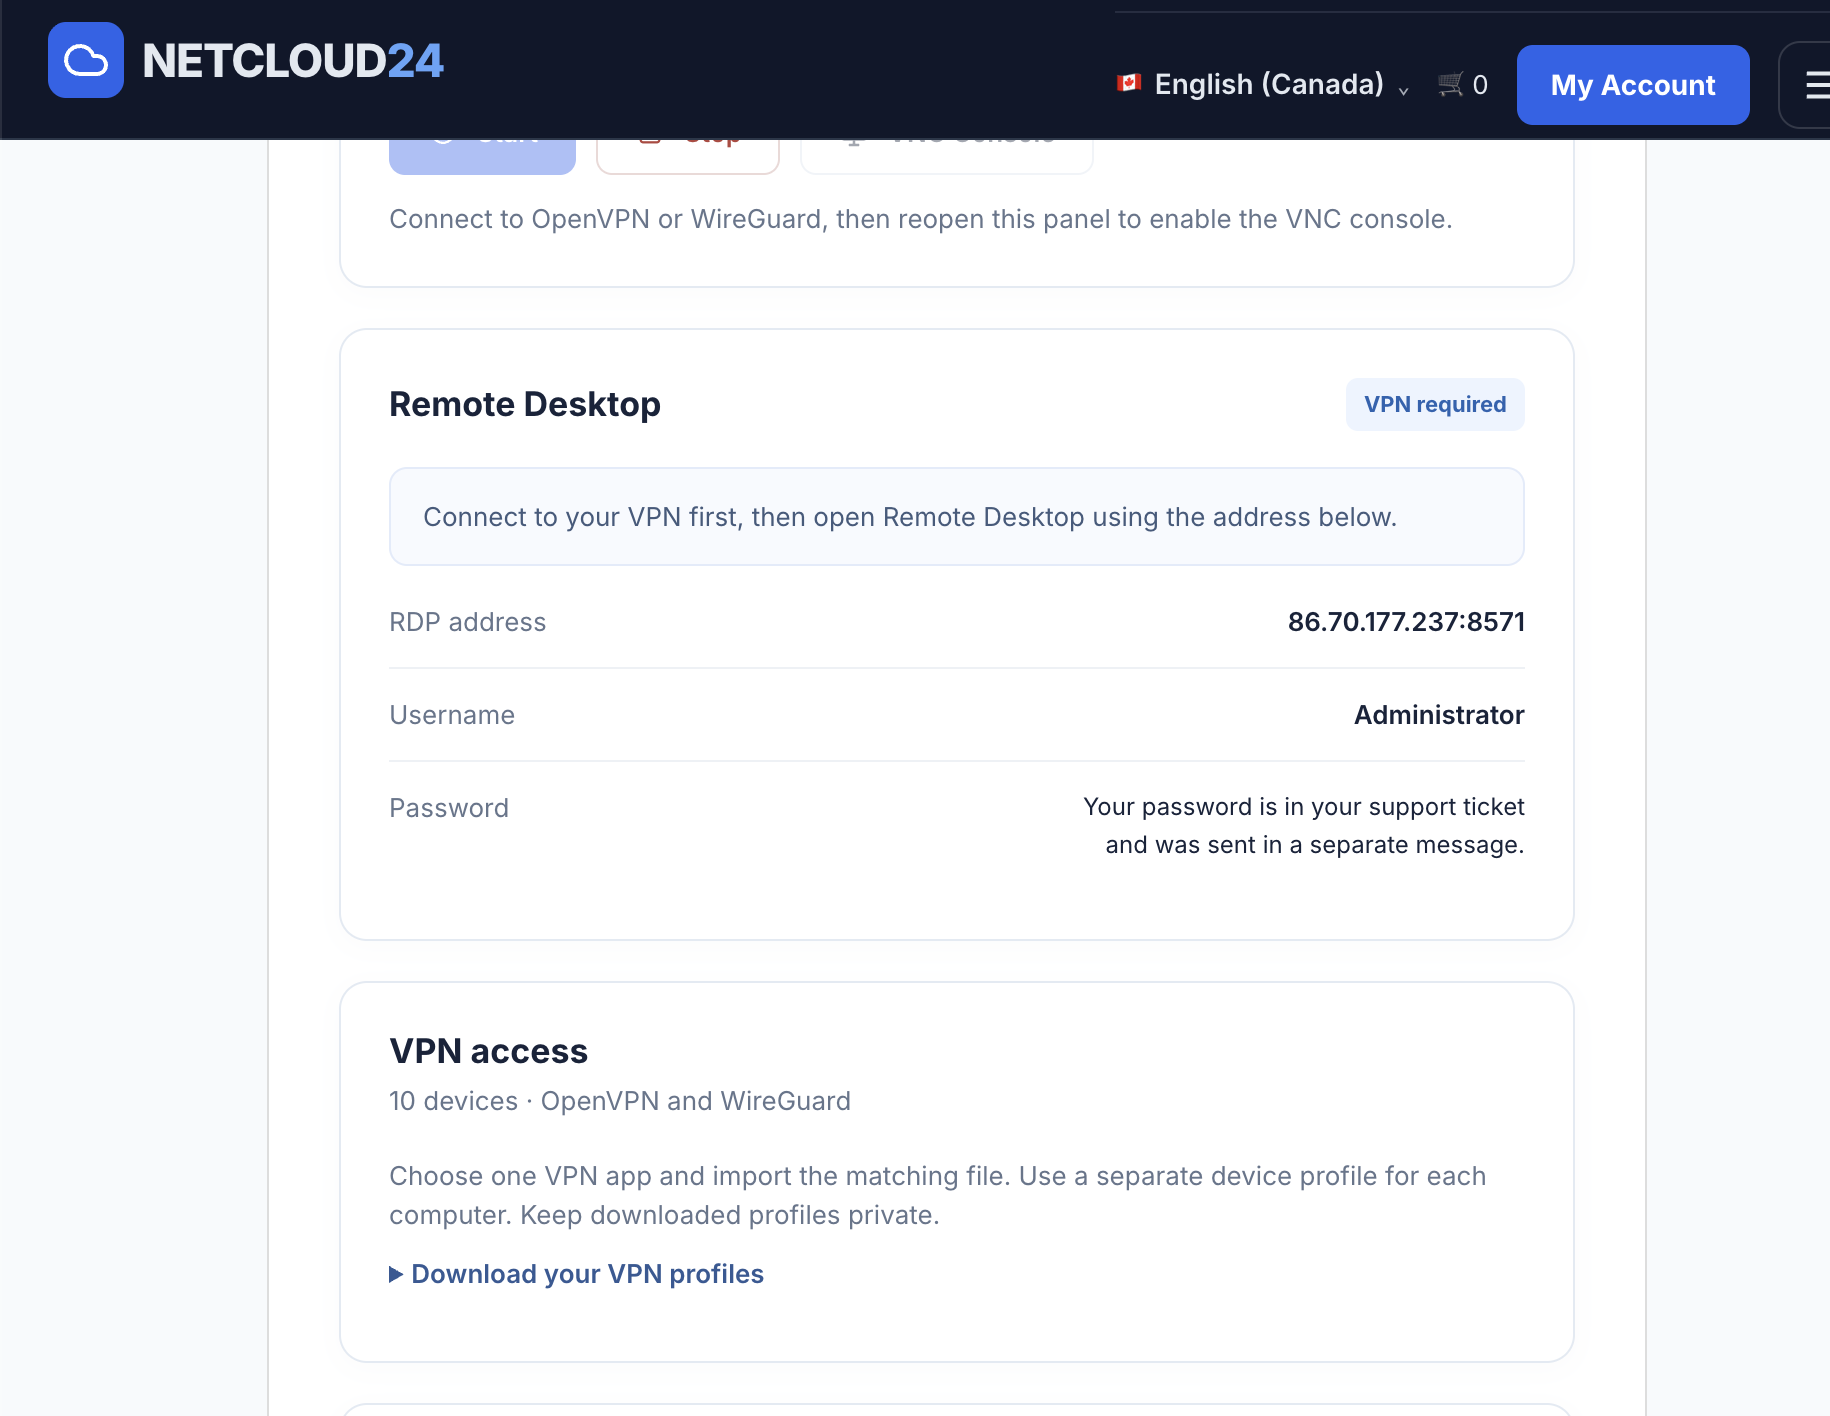
Sign in to the Netcloud24 client area and open the relevant VPS service. Find VPN access, expand Download your VPN profiles, and download the WireGuard profile for this computer. The panel also offers OpenVPN profiles; choose the format that matches the application you will use.
In the same service panel, locate Remote Desktop. Keep its RDP address and Username available. The address may include a port after a colon: copy the entire value. The example panel explains that the password was sent separately and is available in the support ticket. Follow the instructions displayed for your own service.
2. Install the WireGuard application for Windows
Open the official WireGuard installation page and choose Download Windows Installer. Save the installer on the computer from which you will connect. Avoid downloading VPN software from advertisements or unrelated download sites.
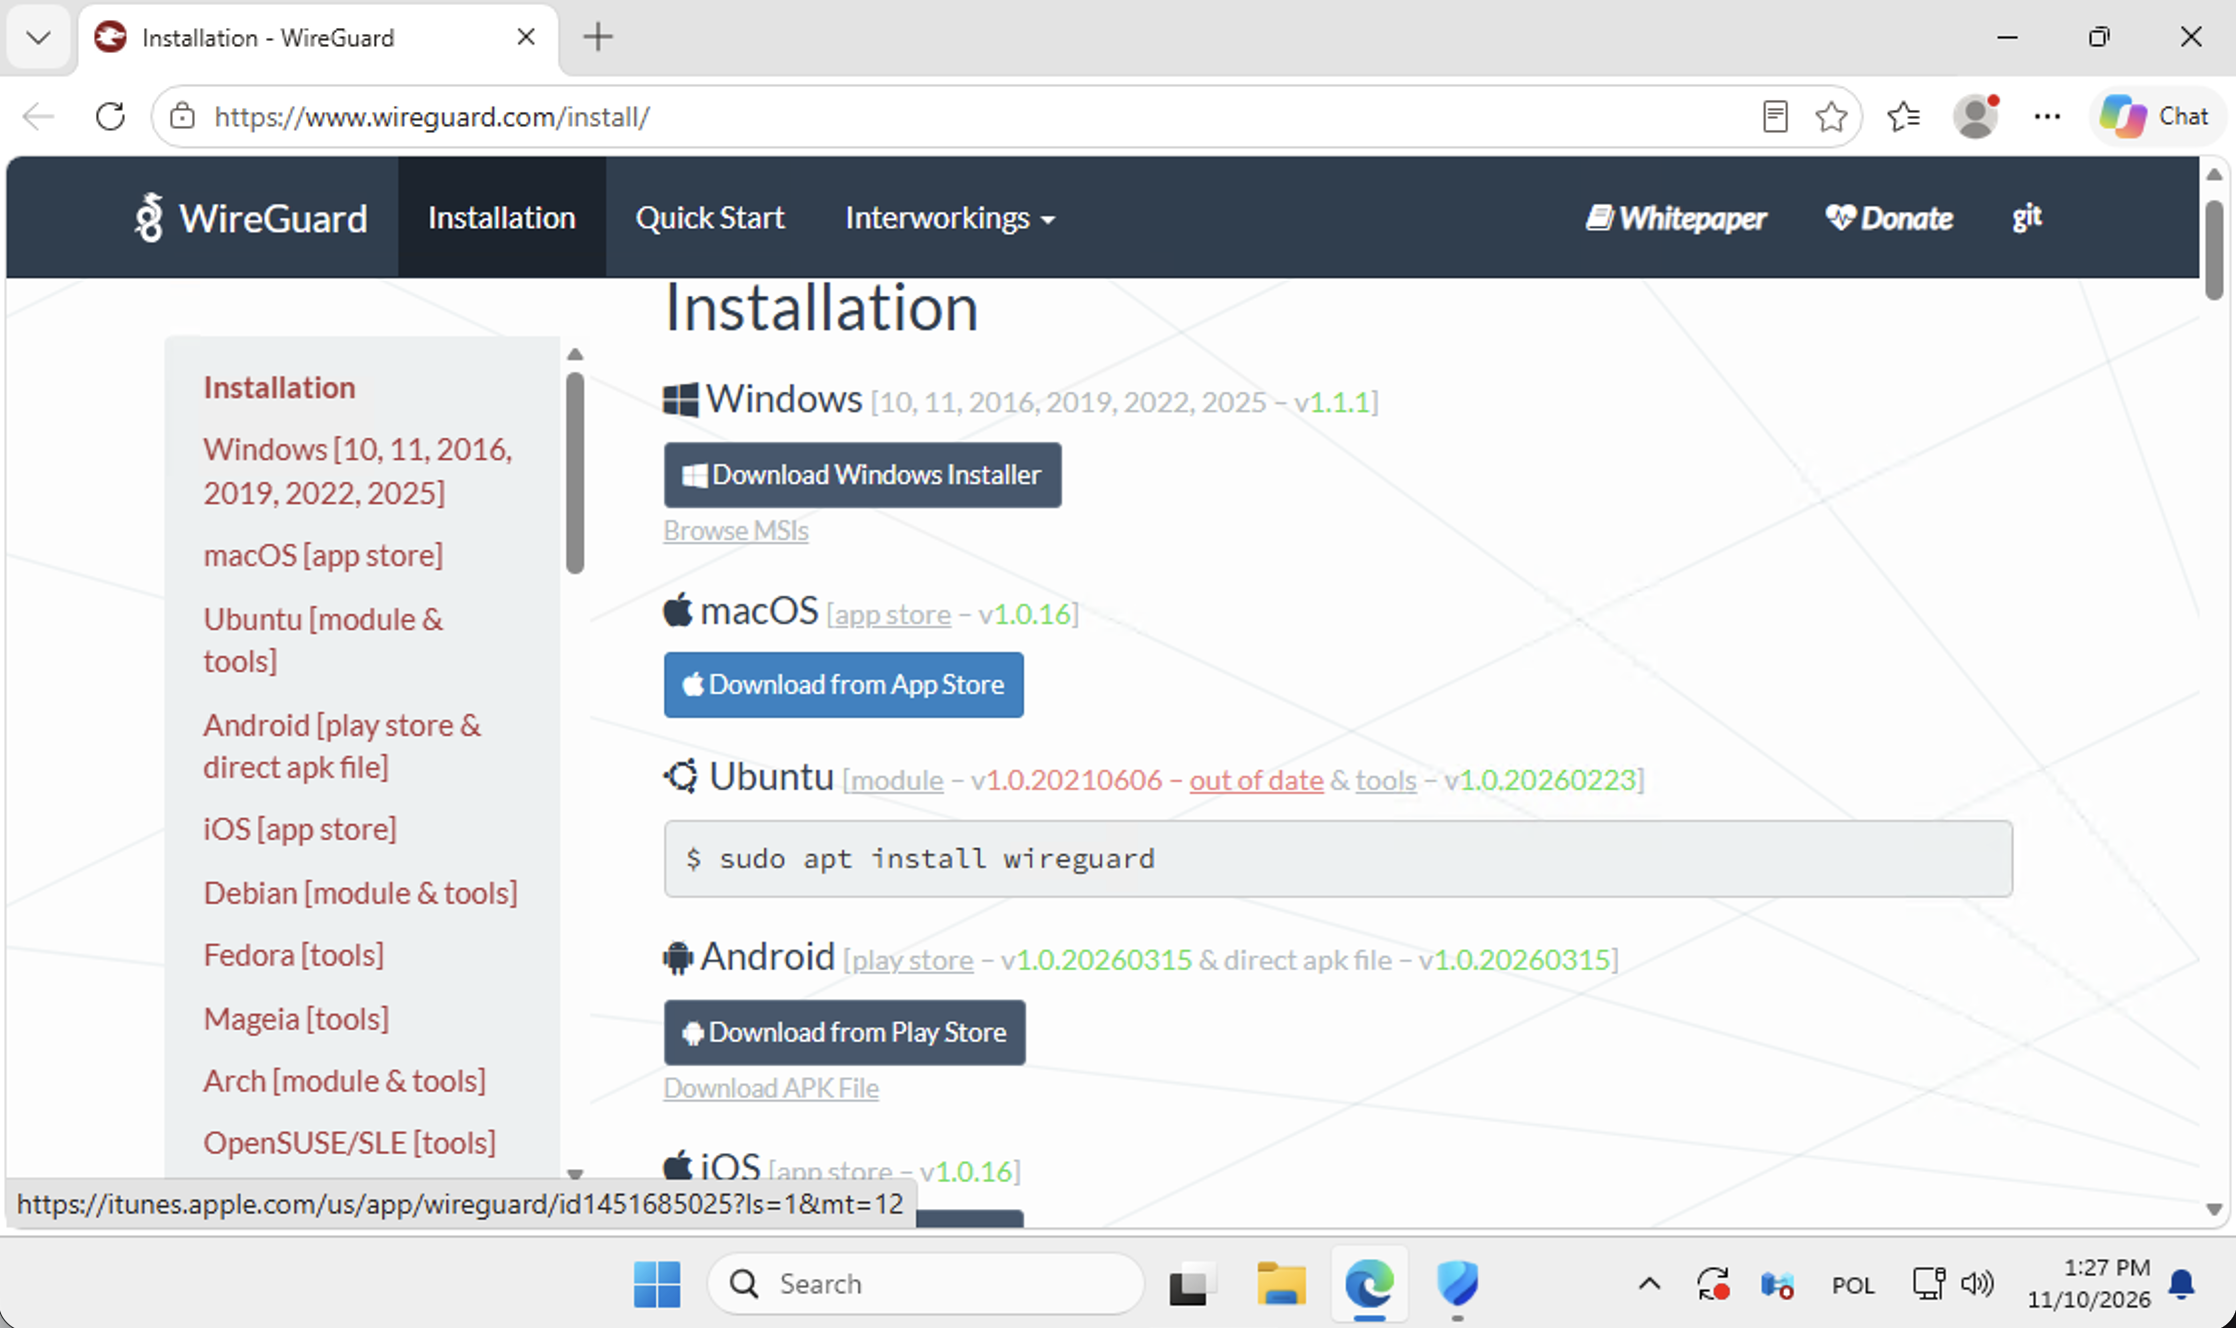
Open your Downloads folder and run wireguard-installer. If Windows requests administrator approval, check that you are opening the installer you just downloaded before allowing installation. Once installation finishes, launch WireGuard. This installs the VPN client on your local computer; you do not need to install it inside the remote VPS just to use the supplied access profile.
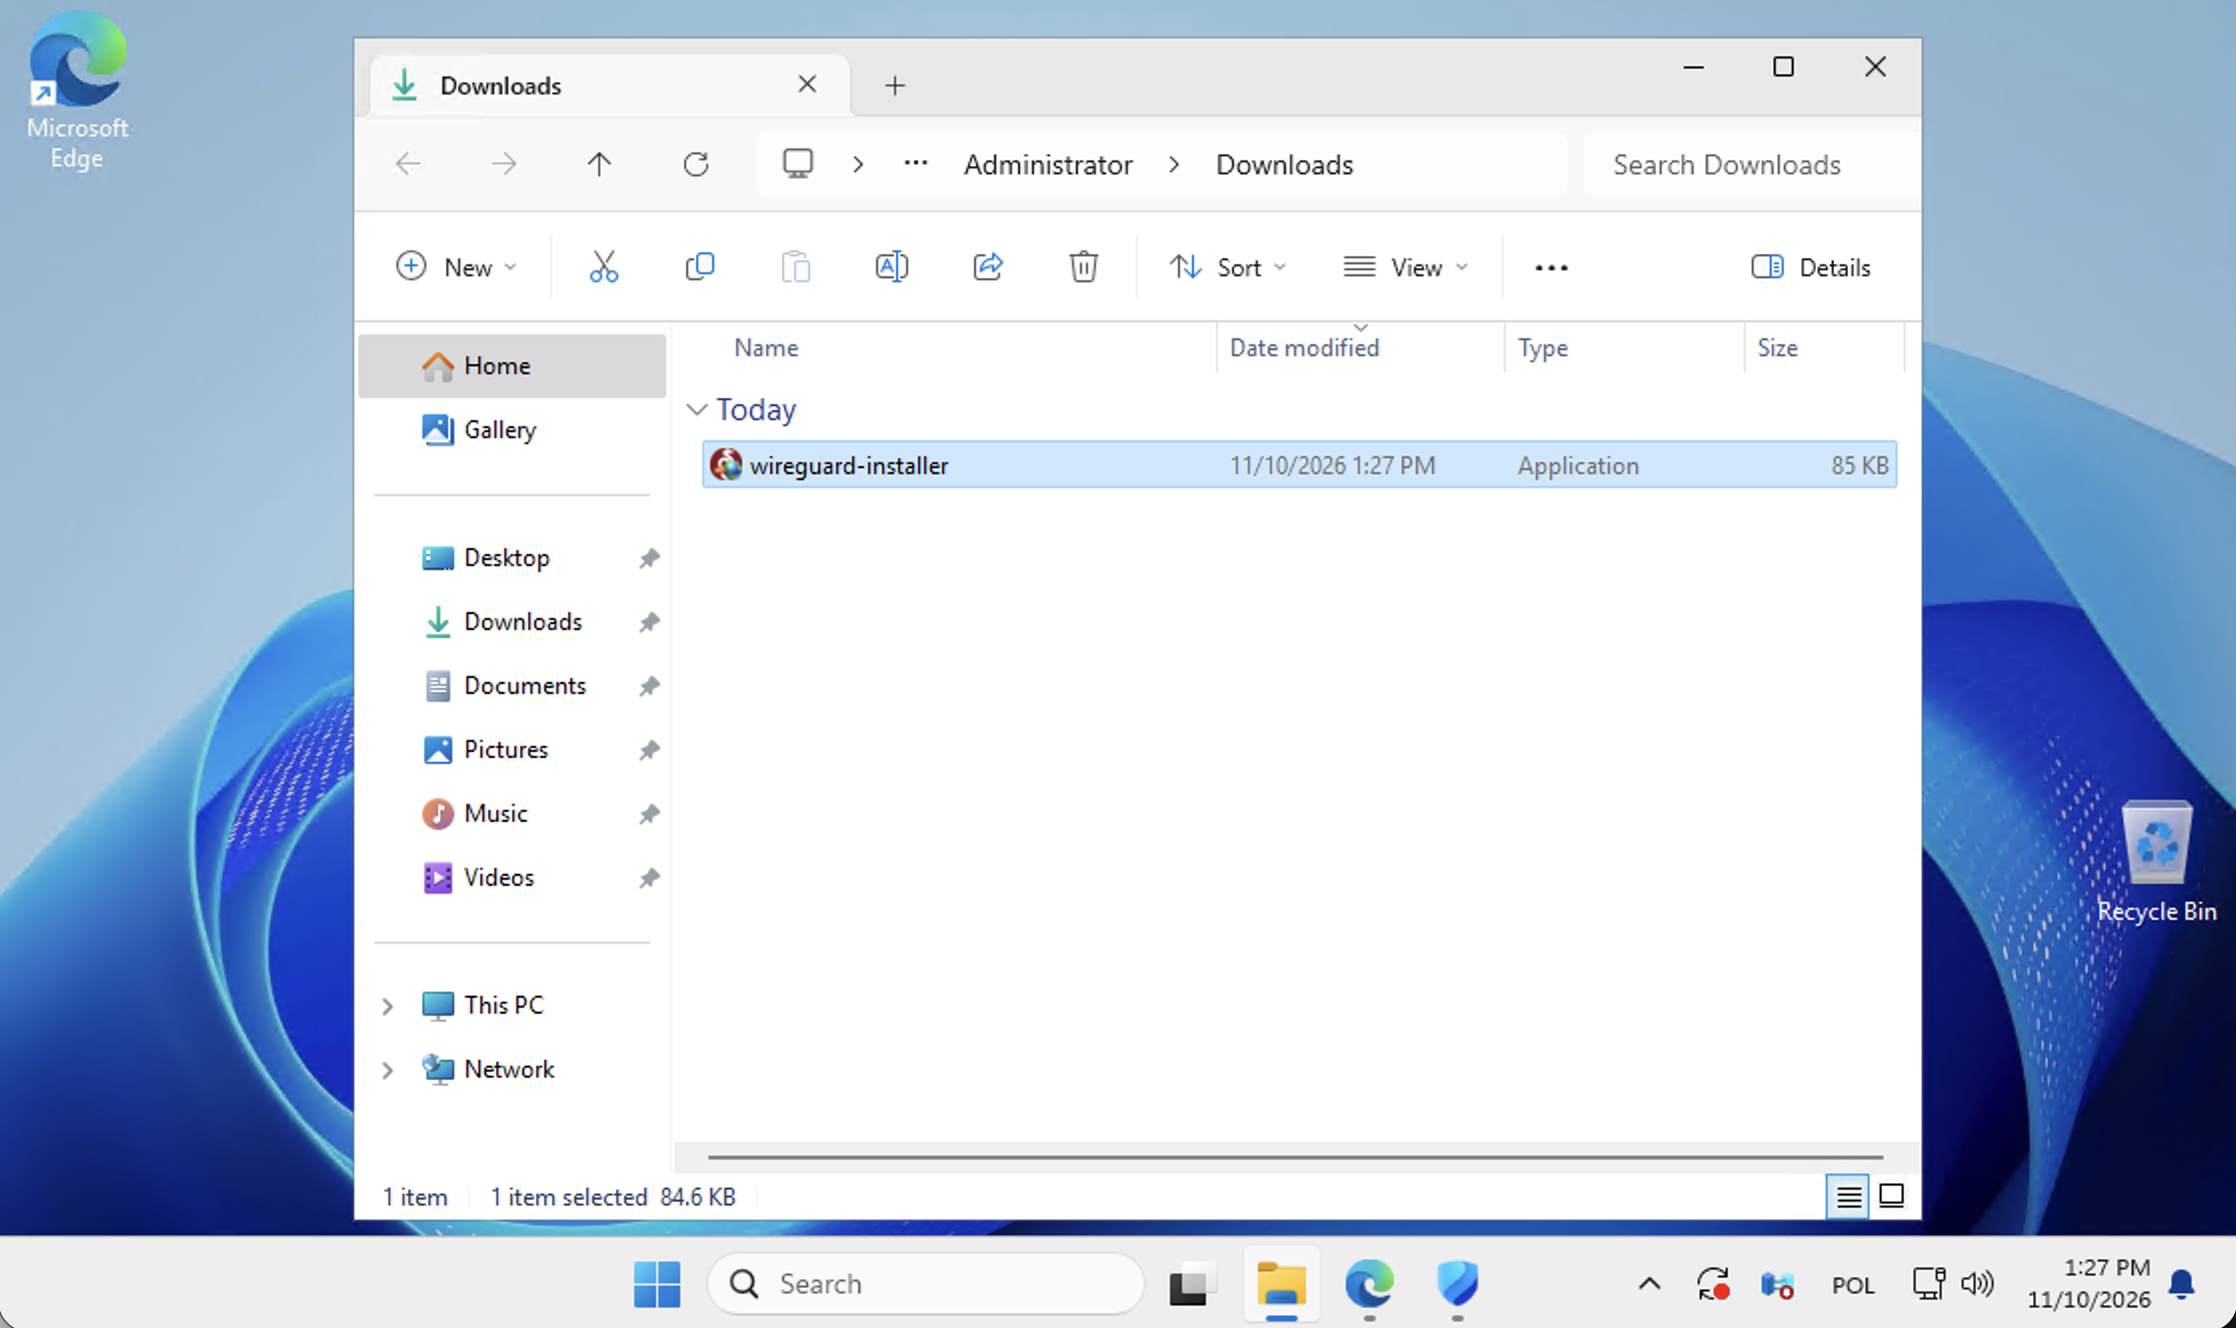
3. Import the configuration downloaded from your panel
In WireGuard, select Import tunnel(s) from file. Browse to the configuration downloaded from VPN access and select it. In this example the file is named vpn.conf; your download may have a different name. A WireGuard configuration normally uses the .conf extension. An OpenVPN .ovpn file belongs in an OpenVPN client instead.
The tunnel should now appear in the left-hand list. Select it and review the details. Inactive is expected immediately after import: it means the profile has been added but the connection has not yet been enabled. Do not replace the keys, endpoint or allowed destinations with values copied from these illustrations.
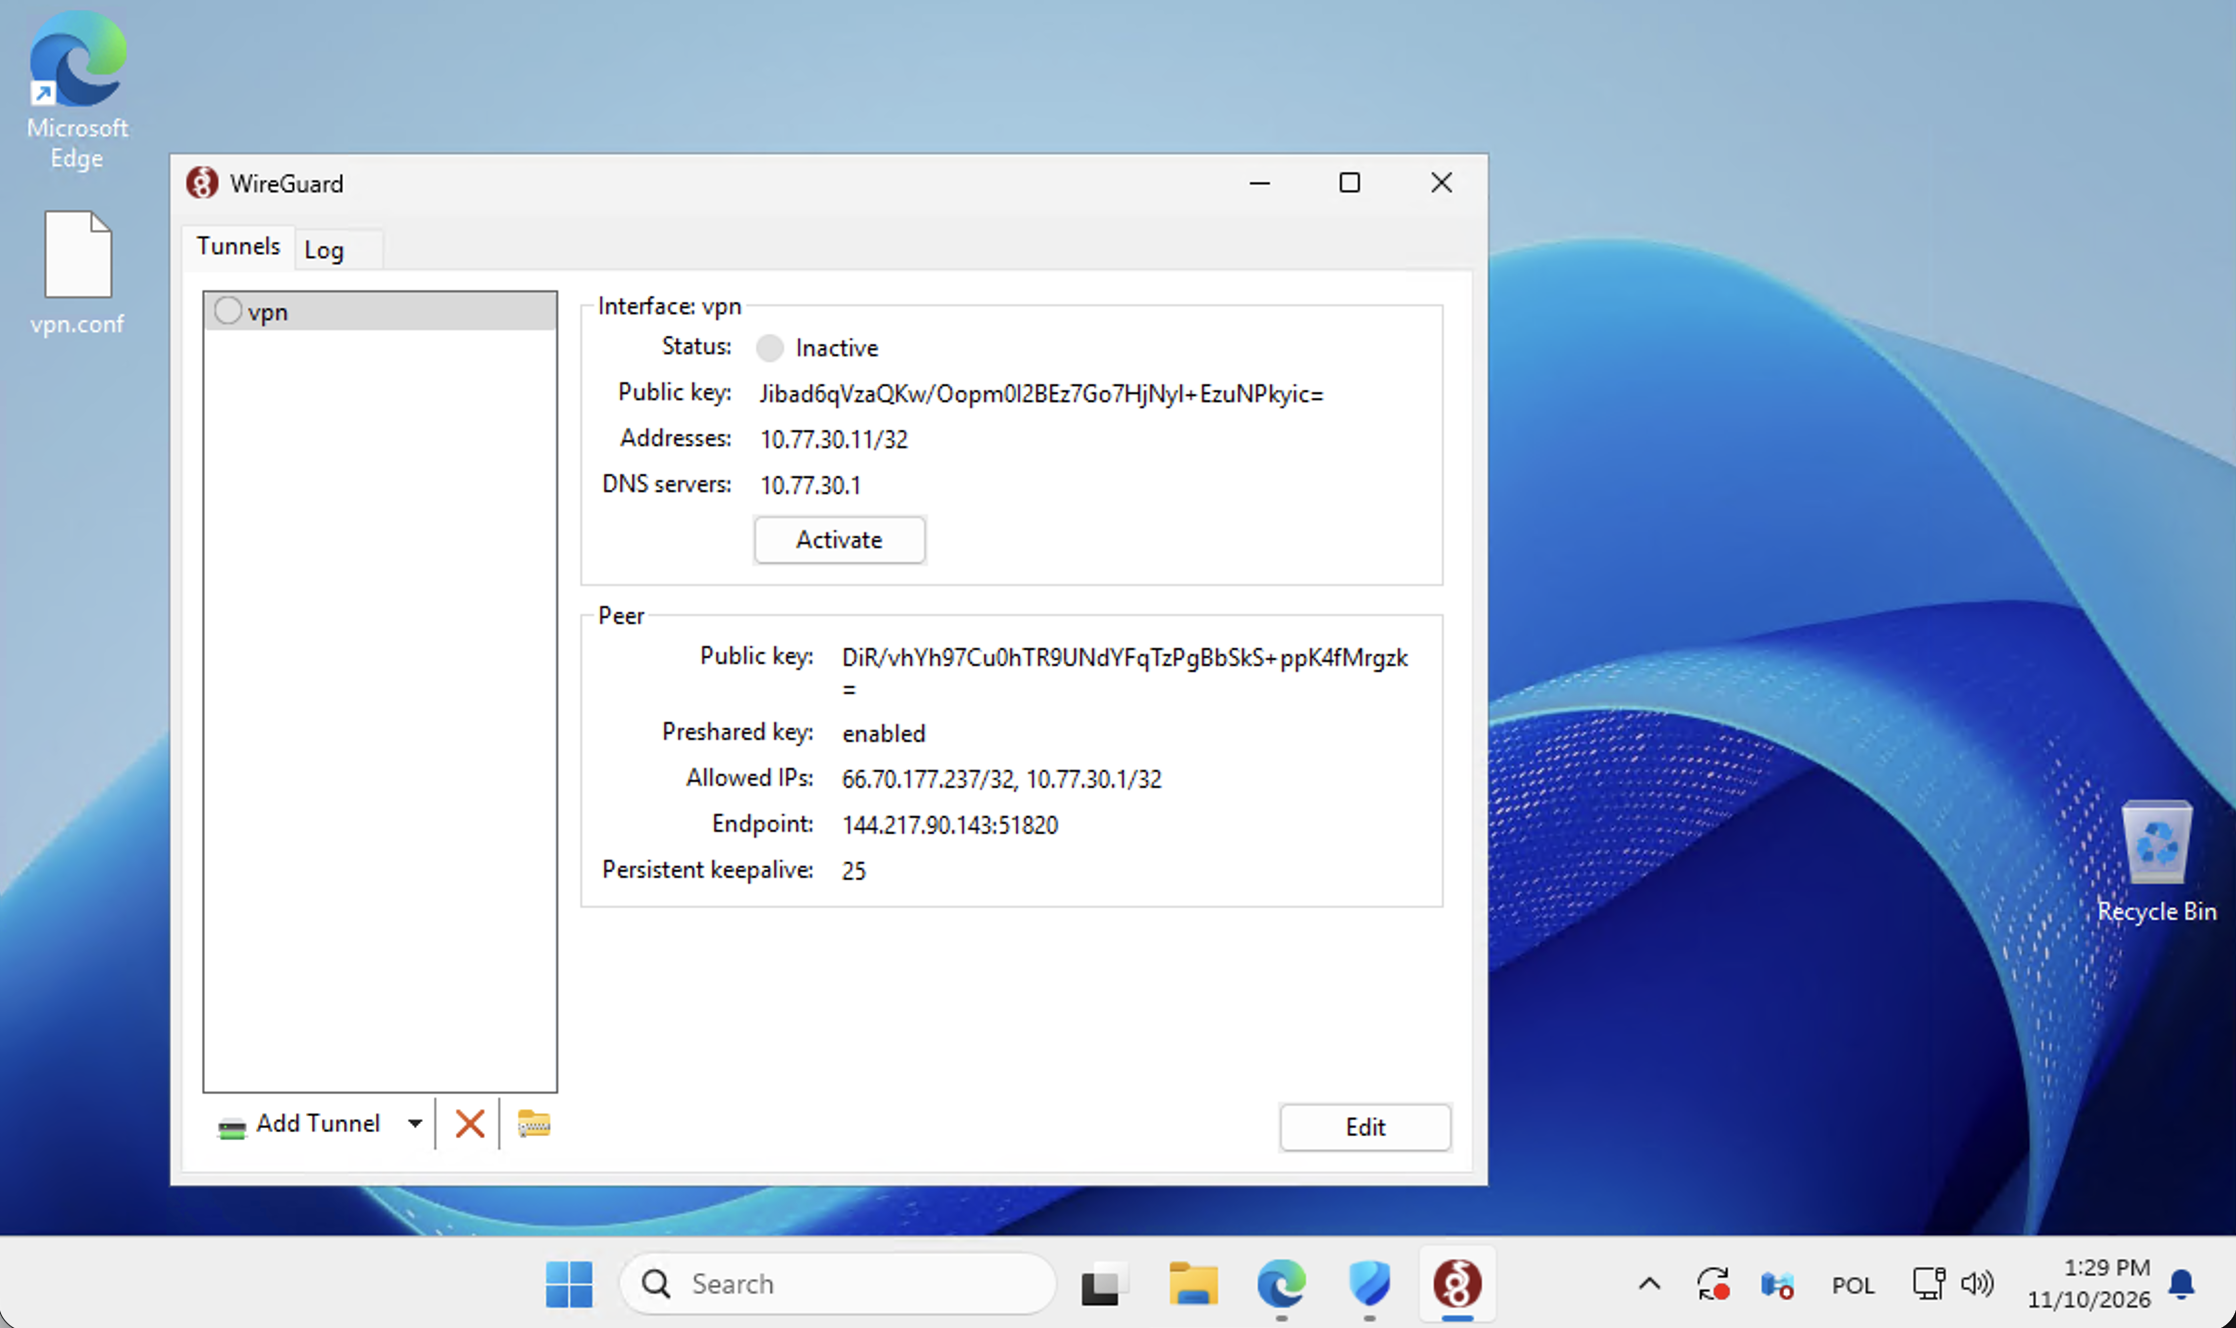
4. Activate the VPN and check the connection
Click Activate. The status should change to Active. After traffic is exchanged with the VPN gateway, look for a recent Latest handshake and increasing transfer counters. The example shows both a recent handshake and received traffic, which demonstrate communication with the configured peer at that moment.
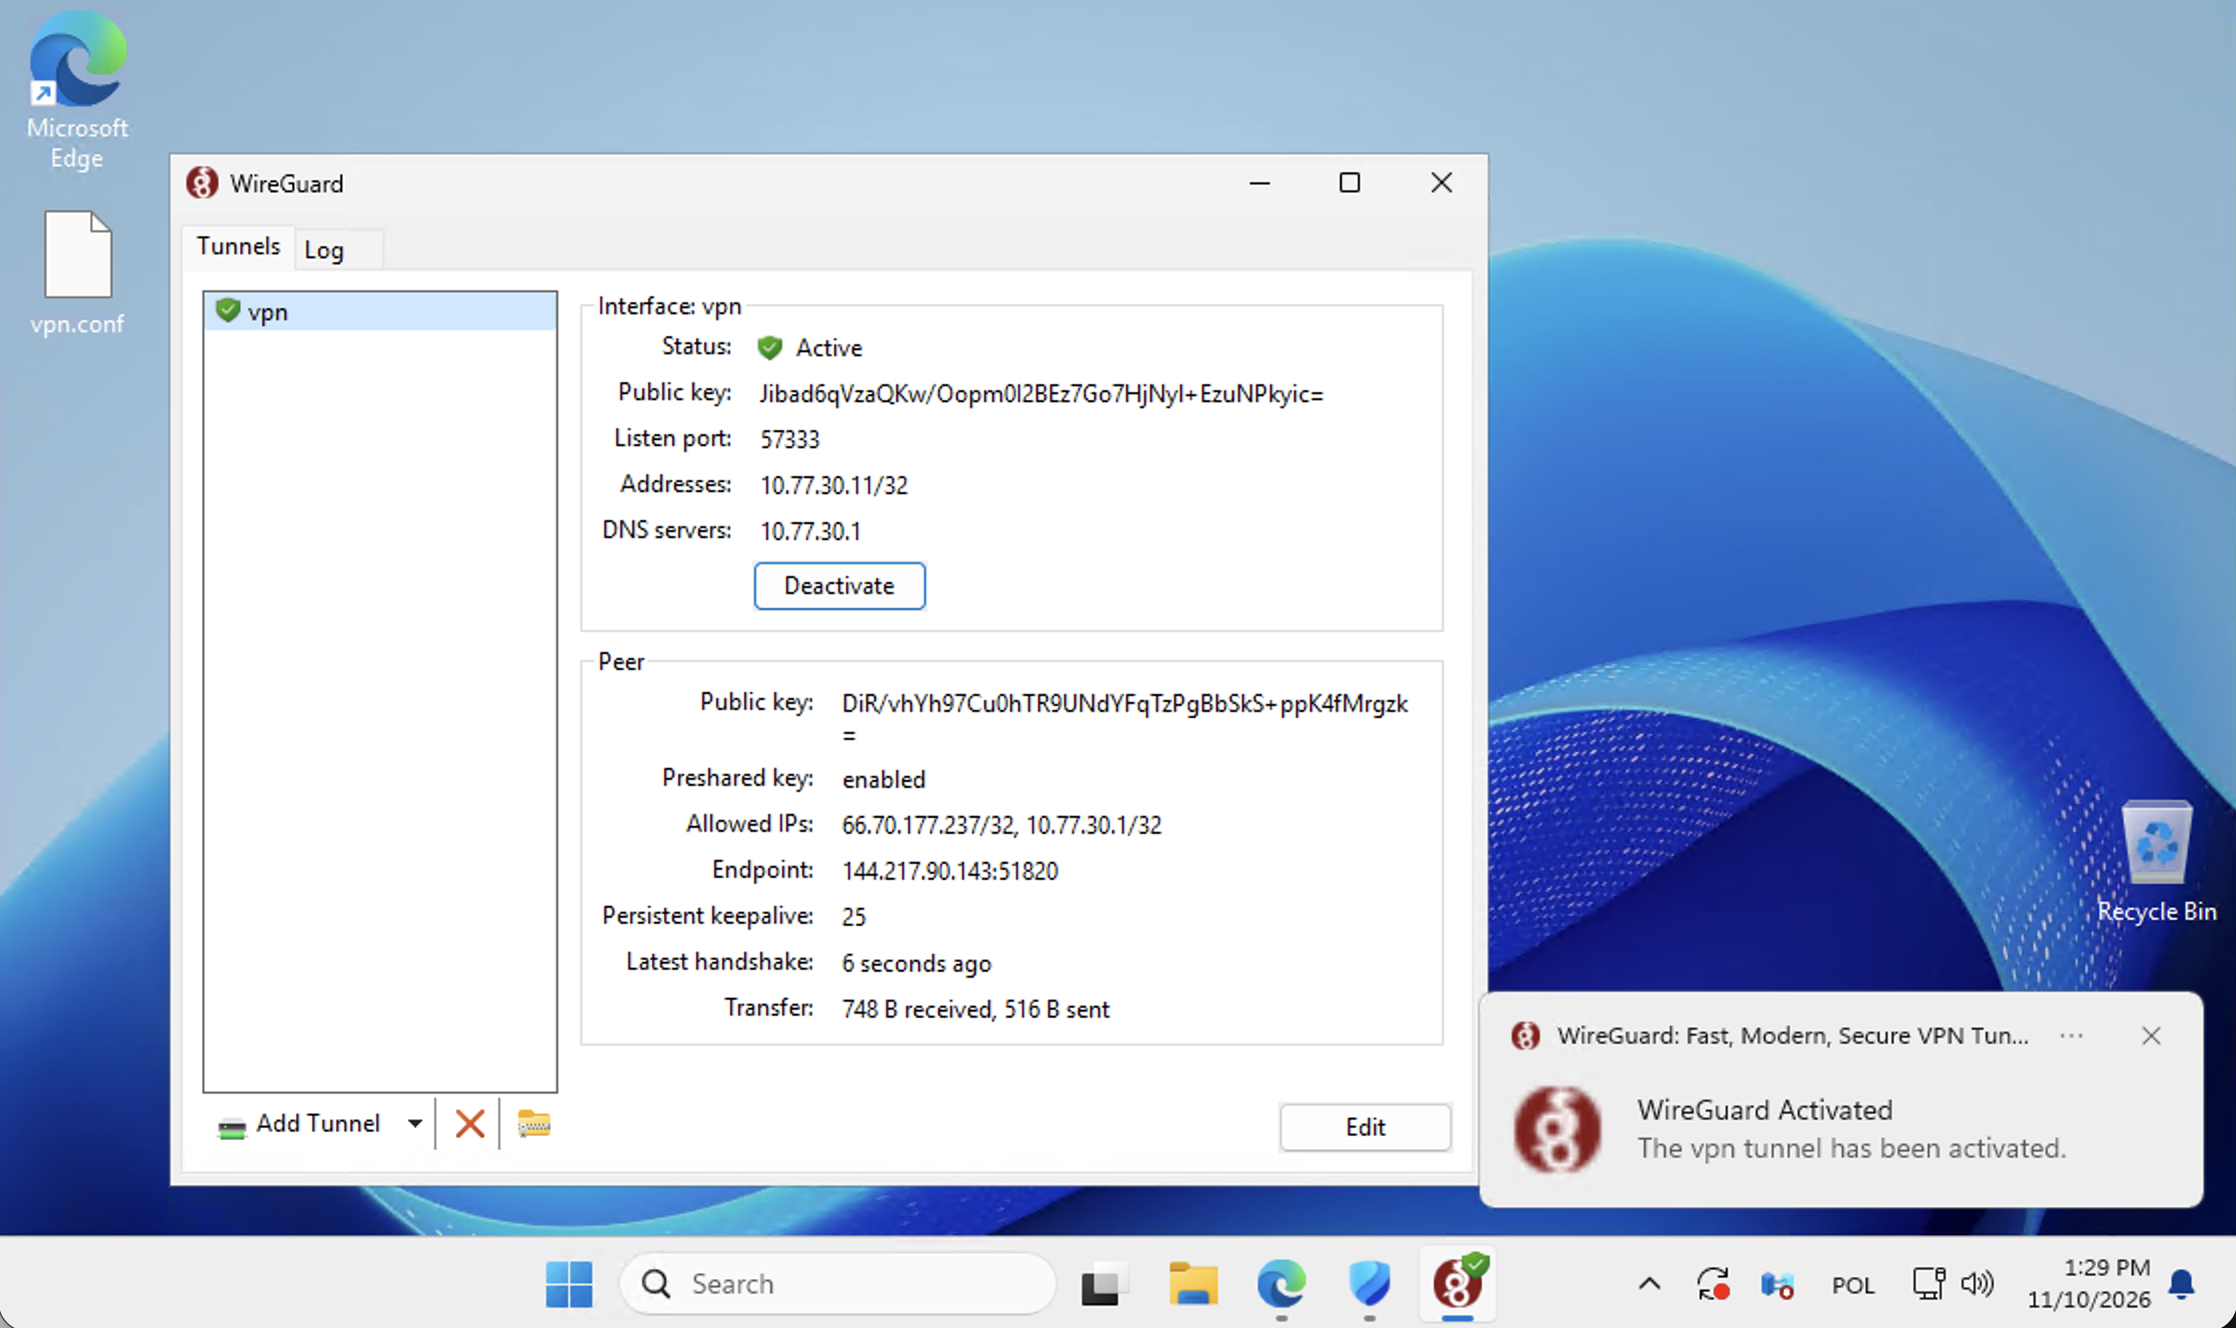
Active does not by itself prove that a particular RDP destination uses the tunnel. WireGuard can use split routing, where only selected destinations travel through the VPN. The older RDP address shown later in this walkthrough is different from the destinations listed in the example profile. For your connection, use the current RDP address and matching VPN profile from the same service panel. If they do not work together, ask support to check the assigned routes rather than editing the profile at random.
Keep WireGuard connected while using the VPS. The panel explicitly marks Remote Desktop as requiring VPN access. Disconnecting the tunnel can interrupt a session that depends on that protected route.
5. Open Remote Desktop Connection
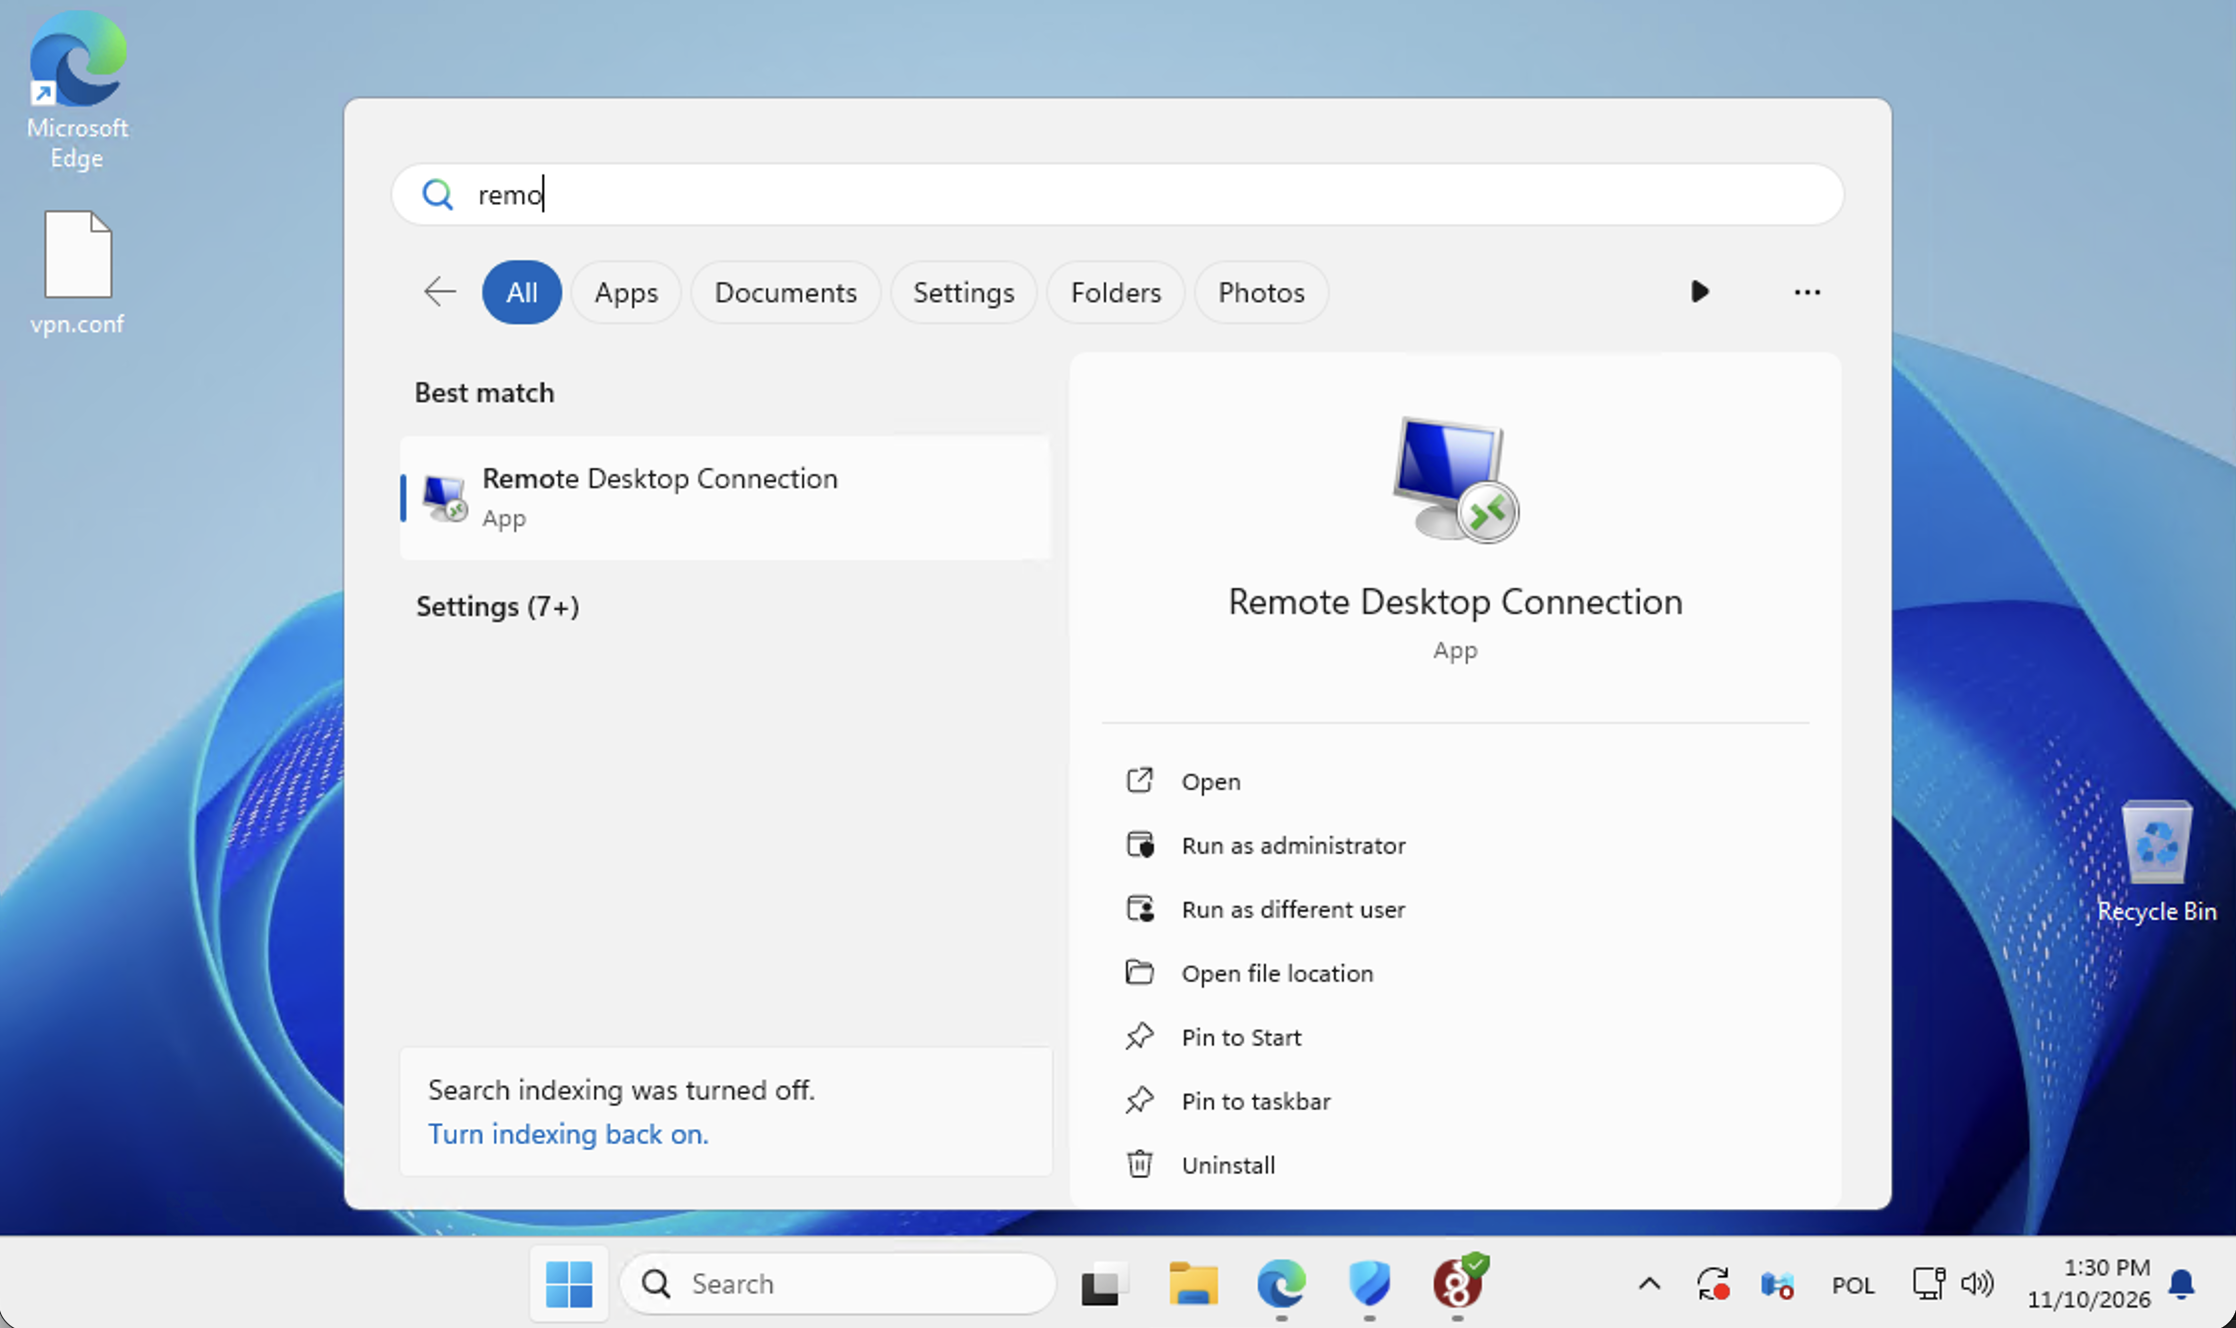
Open Windows Search, type Remote Desktop Connection and launch the application. Alternatively, press Windows + R, enter mstsc and press Enter. Use the client on the same computer where you activated the VPN.
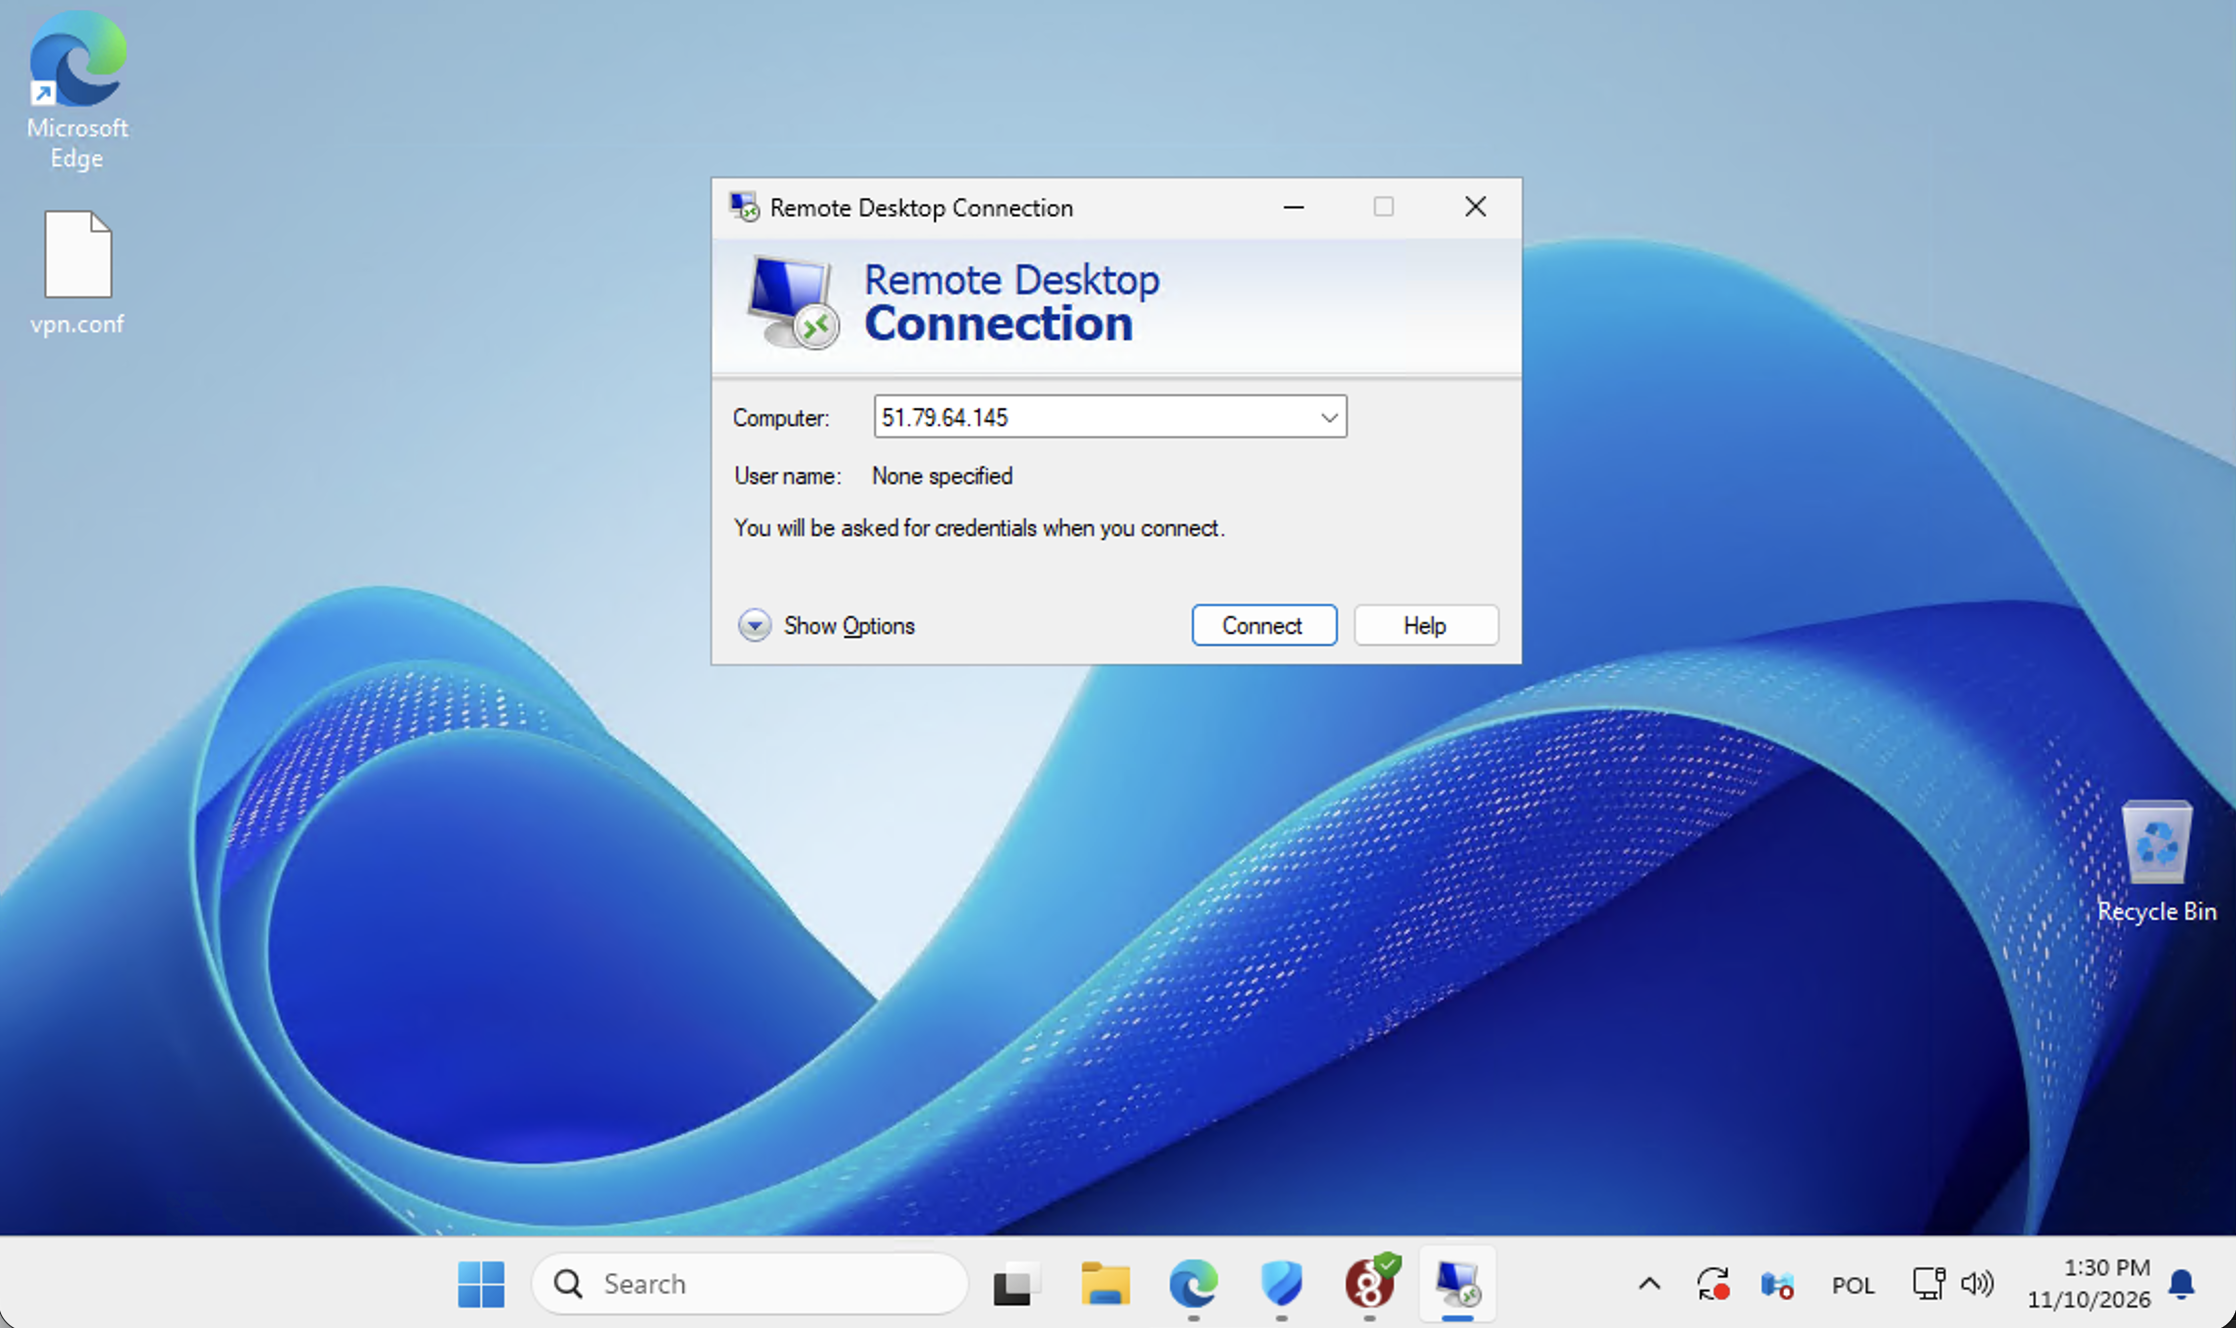
6. Enter the full RDP address from the service panel
Paste the current RDP address into the Computer field. If your panel gives an address with a port, keep both parts, for example server-address:port. Do not substitute the WireGuard gateway endpoint, VPN DNS address or an IP copied from this article. Select Connect.
7. Sign in with the supplied Windows credentials
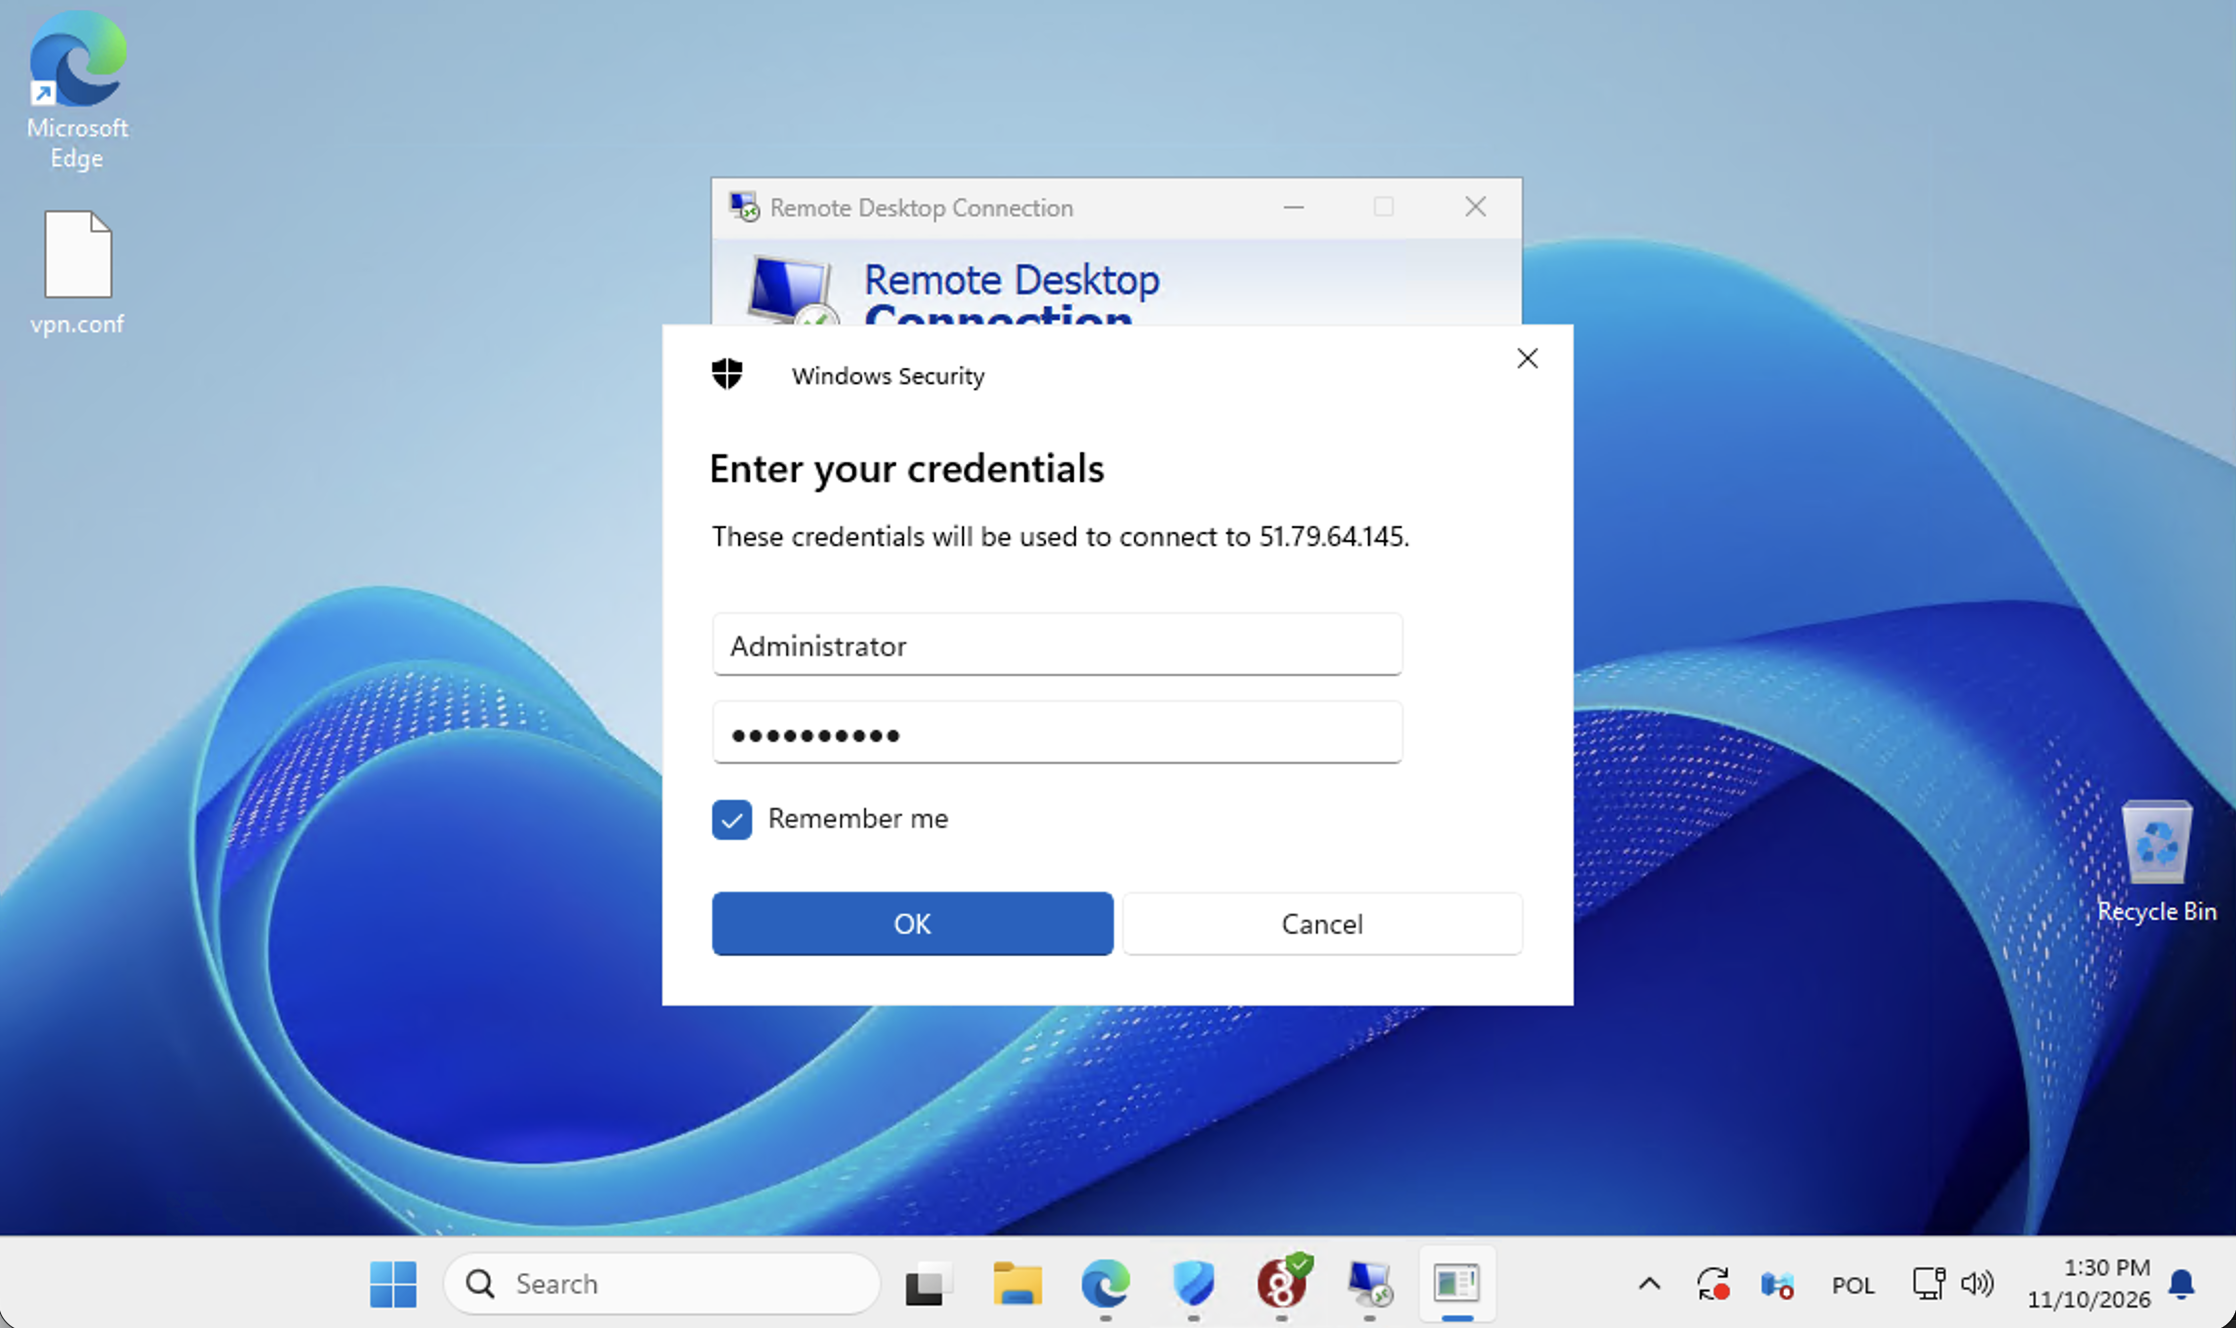
When Windows Security opens, enter the username and password supplied for the VPS. The example uses Administrator; use the account assigned to you. If Windows offers a previously saved account, choose the option to use a different account when necessary.
Leave Remember me unchecked on shared computers. Saving credentials is optional and should follow your organisation’s policy. Never paste the password into a support screenshot or share your VPN configuration publicly.
8. Review any certificate warning before continuing
You may see a message that the remote computer’s identity cannot be verified. The illustrated warning says the certificate is not from a trusted certification authority. This can occur with a self-signed certificate, but the warning alone does not establish that you reached the correct server.
Select View certificate and verify the server identity or certificate fingerprint through a trusted Netcloud24 support channel before proceeding. If anything is unexpected, cancel the connection and contact support. Do not routinely suppress future warnings by selecting Don’t ask me again. A correctly configured hostname and trusted certificate can provide a cleaner verification process.
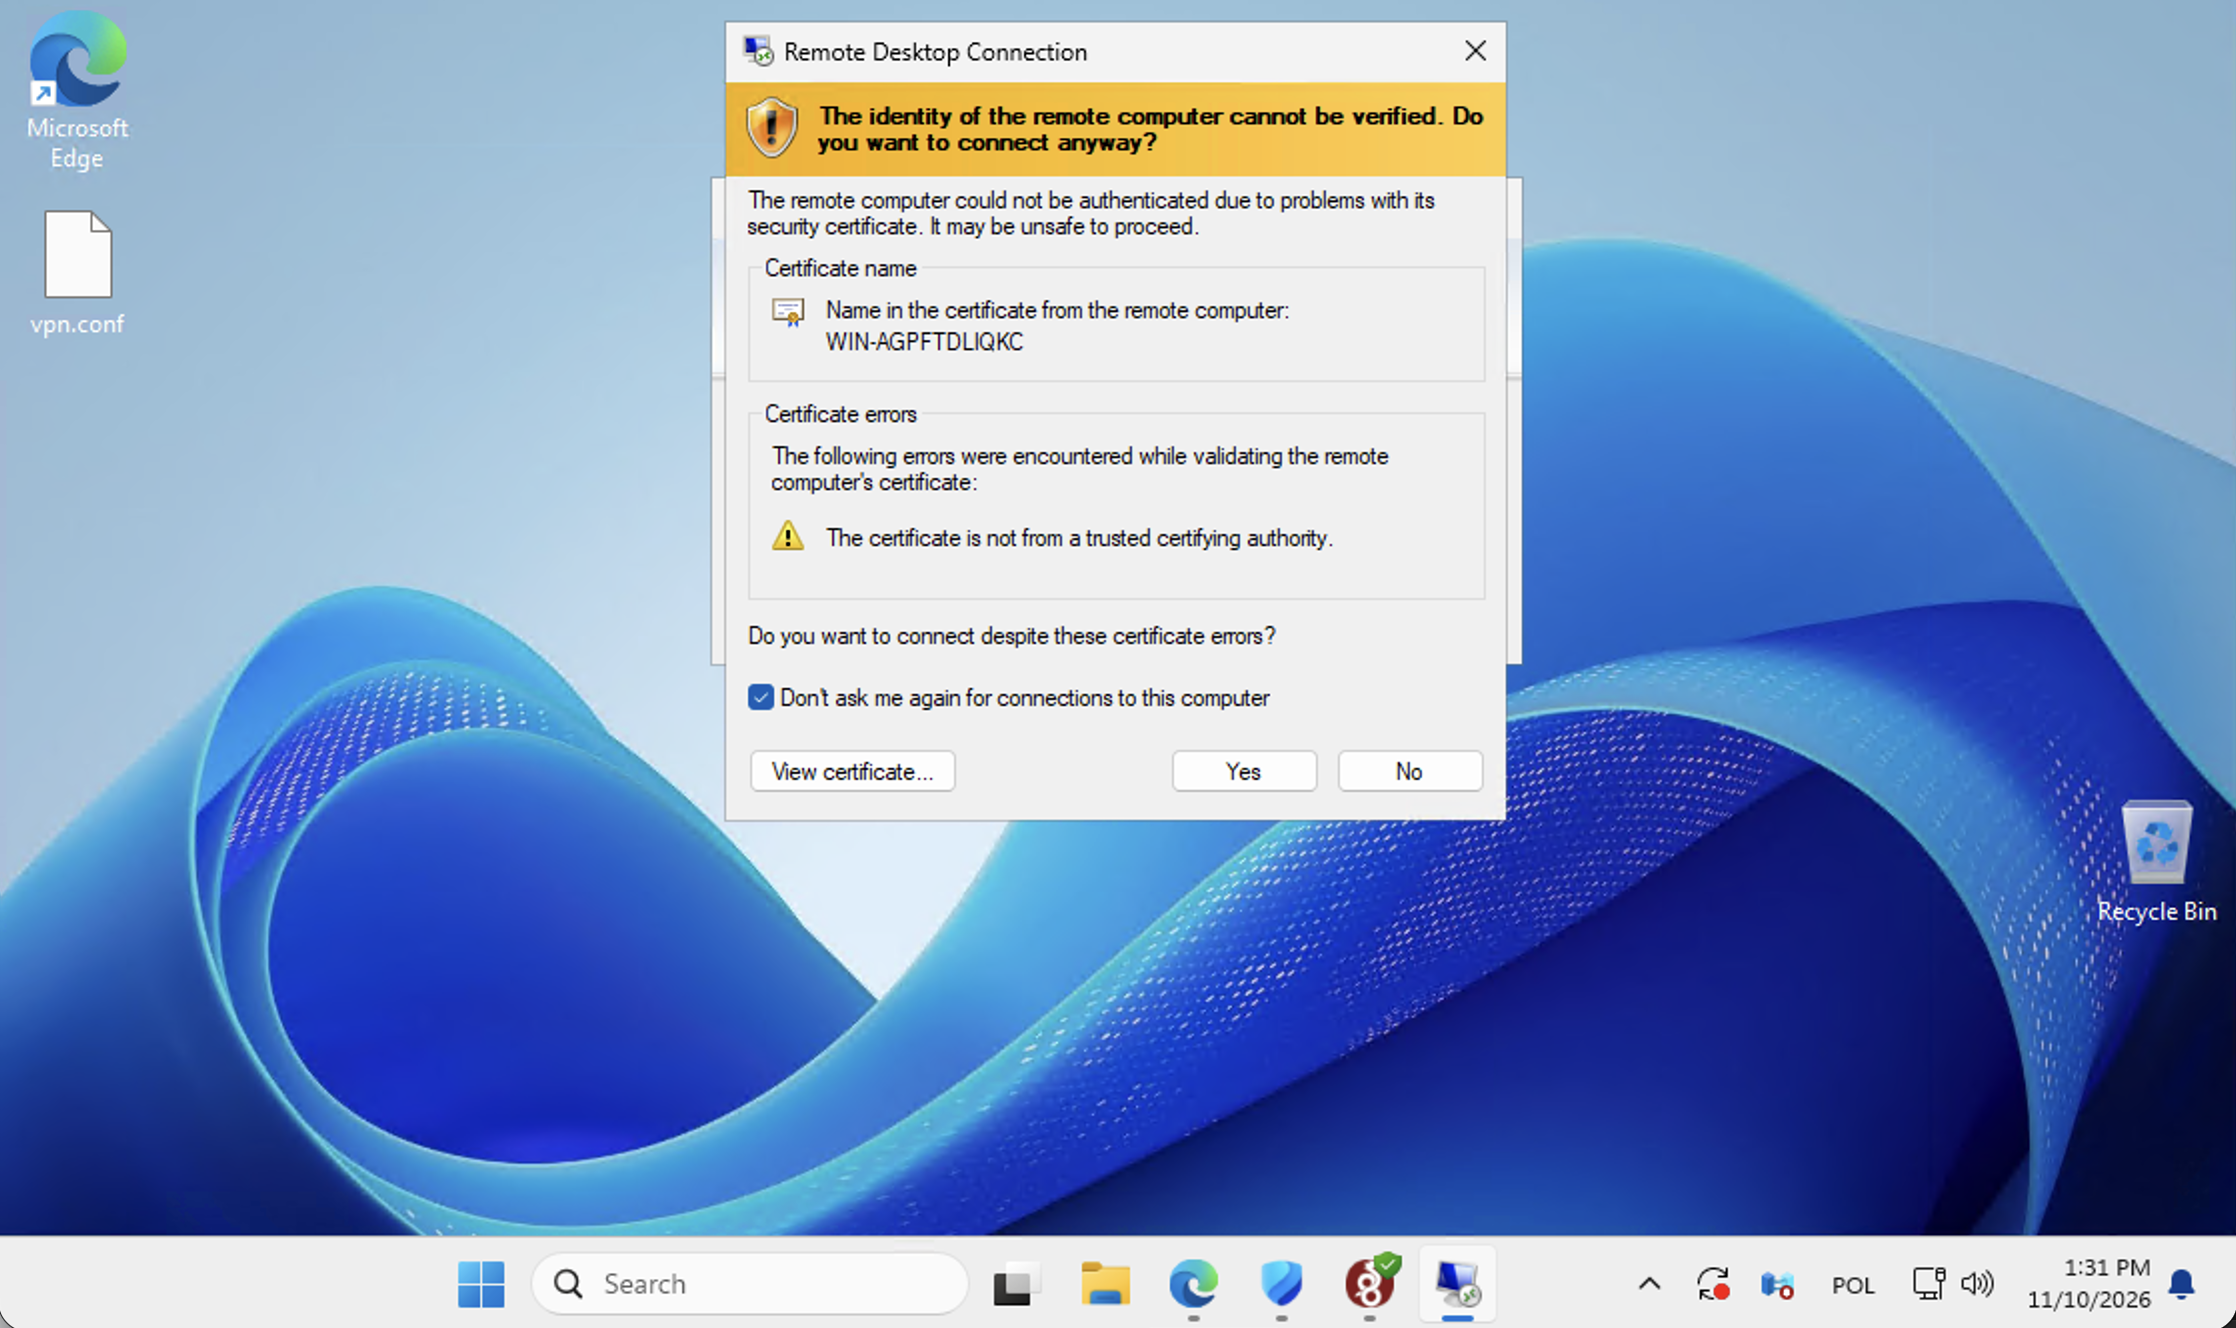
The captured sequence ends at this warning. After identity verification and successful authentication, Windows should open the remote desktop. The images do not show a completed desktop session, so use successful access to your own VPS as the final check.
If the connection does not work
- The profile will not import: download the WireGuard configuration again from VPN access and confirm that you selected the correct device and file type.
- Active, but no recent handshake: check local internet access, the selected profile and the WireGuard Log tab. A local Active status can appear before successful gateway communication.
- Handshake works, but RDP times out: compare the full RDP address and port with the service panel. Ask support to verify routing, access rules and the VPS status. Do not disable the firewall as a first step.
- Credentials are rejected: confirm the supplied username, keyboard layout and latest password in the separate service message.
- You need support: provide the service identifier, approximate failure time and exact error. Redact passwords, private keys and profile contents.
For the Windows client basics, see connecting to a Windows VPS with Remote Desktop. Explore managed Windows VPS hosting for service options, or use your existing service panel for the connection details that apply to your account.
